Defending From the Front - Example
We've included a sequence below that show how it *might* look when your team are defending from the front to try and win the ball back high up the pitch.
- Whites = team in possession
- Pinks = team defending from the front
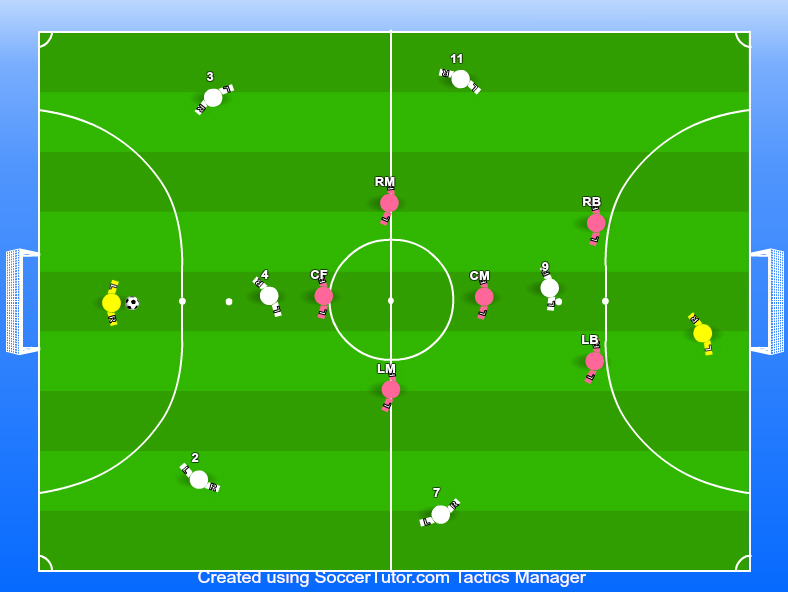
Phase 1. The ball is central with the opposition goalkeeper
Our priority here is to protect the middle of the pitch and the area in front of our own goal. This is where the potential danger is, so we stay compact, central and don't have any large gaps between players that could lead to an easy ball in to the opposition central midfielder or striker. The temptation for a lot of coaches is to "mark up", by man marking each opposition player. This might work against weaker teams, but the gaps you leave by doing this will be exploited by better players who have the awareness and movement off the ball to take advantage. Imagine if in the diagram below you sent the pink LM to mark the number 2, the pink RM to mark the number 3 and the two pink defenders to mark the white 7 and 11. You're leaving HUGE gaps in central areas for players to run into and their number 9 in a 1v1 situation against your CM. Players should protect the space as a priority.
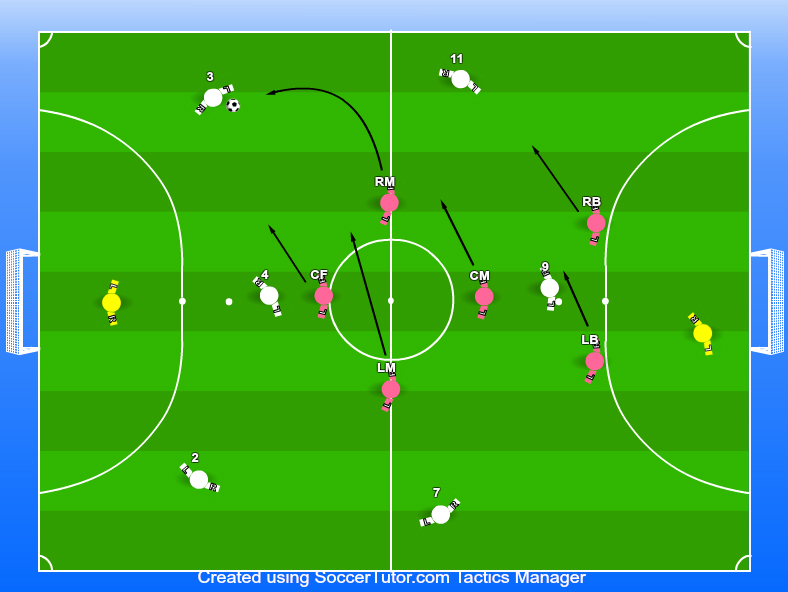
Phase 2: the goalkeeper has passed out to the left back (white number 3):
The goalkeeper has made a choice to keep possession and go short to the number 3. As the ball is travelling, the pinks need to shift across as a unit to close off any danger the number 3 might pose. The two key things we want to stop the number 3 doing are:
- a.) number 3 plays a ball down the line to the number 11 - our RM needs to arc their run (see black arrow) to block the line as a priority. If they go straight to the number 3, they allow a quick pass down the line.
- b.) number 3 plays a ball into a central area - the rest of our team have shifted across and our CM, LM and CF are now making it very hard for the whites to play into dangerous central areas, with our two defenders backing them up by stopping a ball into the opposition number 9 and covering the unlikley event of a ball down the line coming off.
All this leaves the whites with only 2 options - either go backwards / sideways to start again, or trying to force something that probably isn't on.
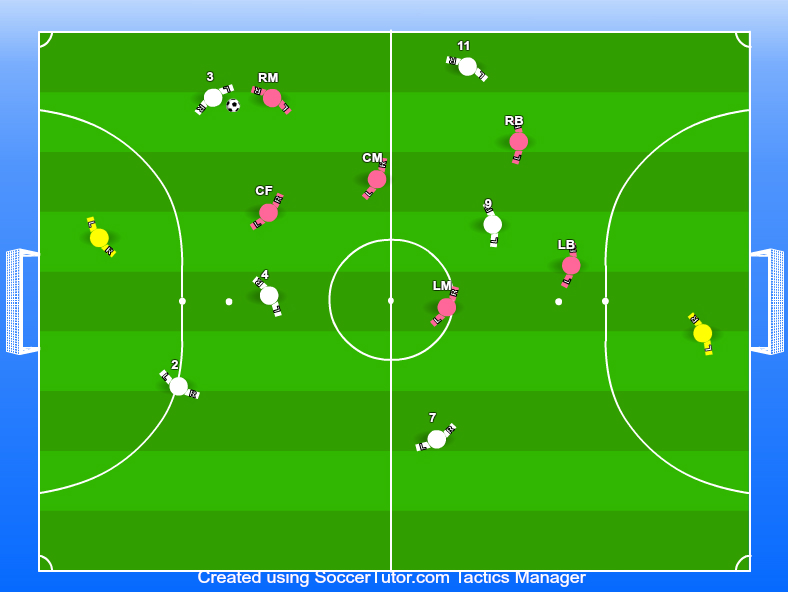
How this looks once the players have reached their destinations:
Looking at the below, you can see the lack of options the whites now have.
And if someone isn't doing their job...
Worth us just highlighting what it looks like if one player isn't doing their job. In the diagram below, our RM has done their job, arcing their run to close off the option down the line from the number 3, but our CM has stayed central, not dropping across to cover. One player not doing their job and suddenly there is a gaping hole, a passing option in to the striker and a goalscoring chance for the opposition.
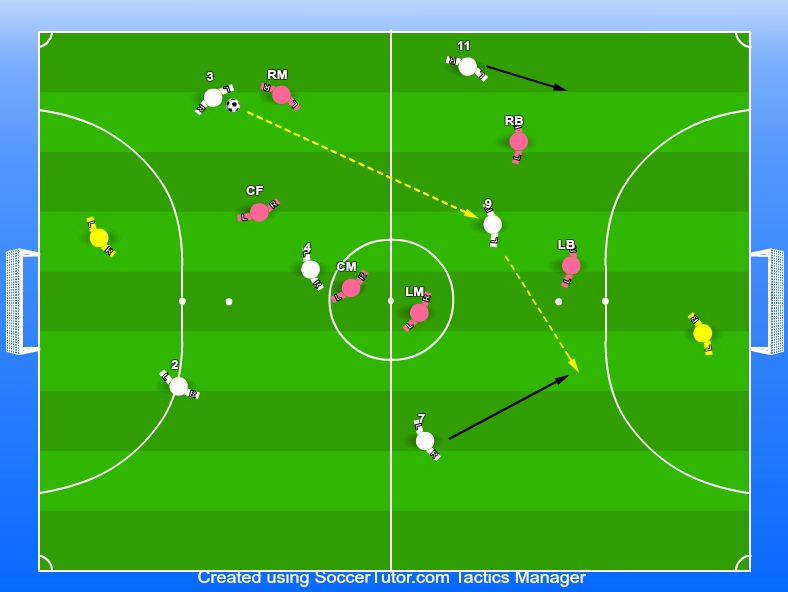
Setting this sort of thing up on a tactics board and moving one or two pieces to show the players this sort of thing can highlight the point effectively.