Rondos - Game Relevance
We've included 3 consecutive diagrams below, to show a very simple phase of play in 11 a side football, starting with the goalkeeper and ending with a ball in to the left winger. In each phase, you can see how the players may end up positionally in a situation that mimics one they would have found themselves in when practicing the 4v2+1 rondo and the 4v2+2 transitional rondo.
The black dotted lines on the diagrams below represent examples of the rectangle of your rondo (if you look carefully, you can find the same pattern all over the pitch). This isn't meant to be a rigid thing - what we're trying to get at is the concept that the things you work on in a rondo, the movements your players make and the angles they find themselves at compared to their team mates are replicated over and over again on the pitch, so a rondo is more than just a passing drill or a simple warm up. It has real game relevance.
Phase 1:
The goalkeeper has the ball at feet and the centre backs have split wide to be options, with the CDM dropping short to be a central option. The goalkeeper shapes to play the ball to the LCB and CDM1 and CDM2 move into space to provide passing options (related to "support in the corners" in your rondo)
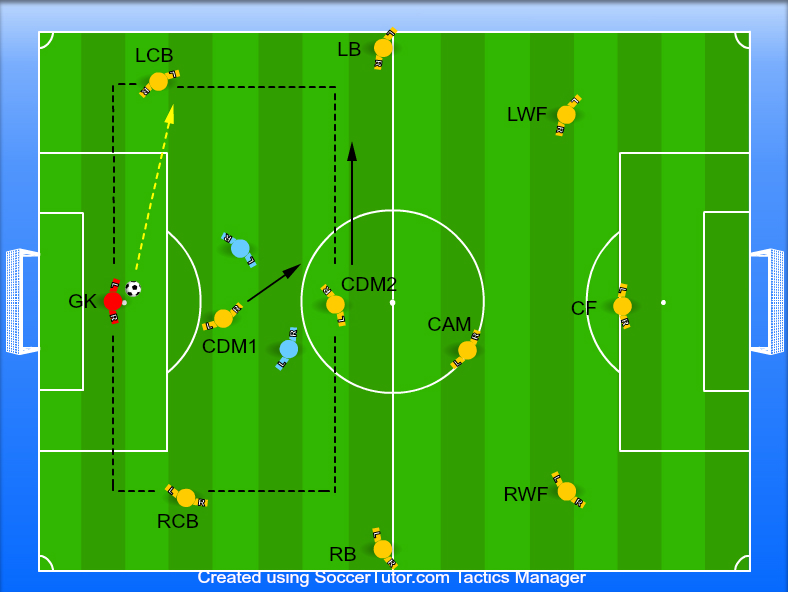
Note - The 2 blue opponents are not the same 2 throughout (that would require some serious energy!!!) - they are simply placed there to show how the 2 defenders in your rondo may again represent opposition your players might be faced with in a game situation.
Phase 2:
The ball has been played to the left sided centre back, who has a wide option down the line (LB), a central option inside (CDM1) and other central options forwards (CDM2 and LW). He can also go back to the goalkeeper and then we're back to phase 1.
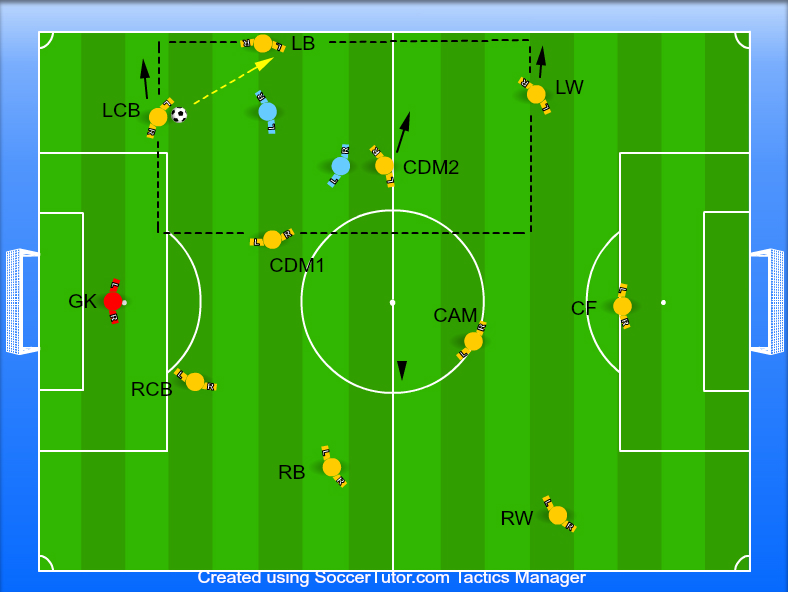
Phase 3:
Our LCB decided to pass down the line to our left back, who has moved to hug the touchline and be an option. He has received the ball onto his back foot to play forwards and is now given options to drive down the line, pass forwards to the left winger (LW), combine with CDM2, switch to the CAM or if he's held up, go back to the LCB or CDM1.

Of course, in reality, the players all have other options (in the third diagram, the LB could use a long, aerial switch of play to the RW for example) but in terms of the relevance of our rondo practice, you can see how this phase of play constantly mimics situations the players have found themselves in in training. If you're wanting to encourage short, sharp passing to work your way round the pitch, these practices are excellent tools to use.
Other rondos will all mimic shapes on the pitch in their own way. Ideas, thoughts, questions, please shout...